# XOA Support
This is the section dedicated to all XOA details and how to get support on it.
TIP
As a XOA user, you can open tickets in your support panel: https://support.vates.fr/ (opens new window).
# Technical Support
XOA is the only way to get our pro support, which is available remotely via SSH and a special tunnel.
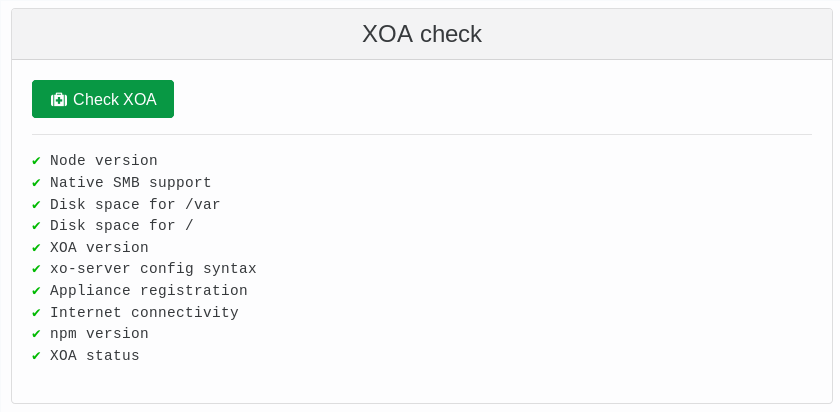
# XOA Check
XOA check is a way to test if you XOA is correctly configured. It should be the first thing to do if you have any problem!
To run this check, in the web UI, you can access the support section in the XOA menu. In this section you can launch an xoa check command:
# Support tunnel
Open a secure support tunnel so our team can remotely investigate on your XOA. For that, we need to get the "support ID". See below:

If your web UI is not working, you can also open the secure support tunnel from the CLI. To open a private tunnel (we are the only one with the private key), you can use the command xoa support tunnel like below:
$ xoa support tunnel
The support tunnel has been created.

Do not stop this command before the intervention is over!
Give this id to the support: 40713
Give us this number, and we'll be able to access your XOA in a secure manner. Then, close the tunnel with Ctrl+C after your issue has been solved by support.
TIP
The user xoa-support is used by the tunnel. If you want to deactivate this bundled user, you can run chage -E 0 xoa-support. To re-activate this account, you must run chage -E 1 xoa-support.
# XOA VM Specifications
By default, the VM is configured with:
- 2 vCPUs
- 2GiB of RAM
- 20GiB of free SR space (2GiB on thin pro SR)
For use on huge infrastructure (more than 500+ VMs), feel free to increase the RAM.
# Alternative install
Please only use this if you have issues with the default way to deploy XOA.
# Via a bash script
Alternatively, you can deploy it by connecting to your XCP-ng/XenServer host and executing the following:
bash -c "$(wget -qO- https://xoa.io/deploy)"
TIP
This won't write or modify anything on your XCP-ng/XenServer host: it will just import the XOA VM into your default storage repository.
WARNING
If you are using an old XCP-ng/XenServer version, you may get a curl error:
curl: (35) error:1407742E:SSL routines:SSL23_GET_SERVER_HELLO:tlsv1 alert protocol version
It means that the secure HTTPS protocol is not supported, you can bypass this using the unsecure command instead:
bash -c "$(wget -qO- http://xoa.io/deploy)"
Follow the instructions:
- Your IP configuration will be requested: it's set to DHCP by default, otherwise you can enter a fixed IP address (eg
192.168.0.10) - If DHCP is selected, the script will continue automatically. Otherwise a netmask, gateway, and DNS server should be provided.
- XOA will be deployed on your default storage repository. You can move it elsewhere anytime after.
# Via a manual XVA download
You can also download XOA from xen-orchestra.com in an XVA file. Once you've got the XVA file, you can import it with xe vm-import filename=xoa_unified.xva or via XenCenter.
If you want to use static IP address for your appliance:
xe vm-param-set uuid="$uuid" \
  xenstore-data:vm-data/ip="$ip" \
  xenstore-data:vm-data/netmask="$netmask" \
  xenstore-data:vm-data/gateway="$gateway"
If you want to replace the default DNS server:
xe vm-param-set uuid="$uuid" xenstore-data:vm-data/dns="$dns"
After the VM is imported, you just need to start it with xe vm-start vm="XOA" or with XenCenter.
# First console connection
# Deployed with the web deploy form (opens new window)
In that case, you already set the password for xoa user. If you forgot it, see below.
# Manually deployed
If you connect via SSH or console for the first time without using our web deploy form (opens new window), be aware there is NO default password set for security reasons. To set it, you need to connect to your host to find the XOA VM UUID (eg via xe vm-list).
Next, you can replace <UUID> with the UUID you found previously, and <password> with your password:
xe vm-param-set uuid=<UUID> xenstore-data:vm-data/system-account-xoa-password=<password>
TIP
Don't forget to use quotes for your password, eg: xenstore-data:vm-data/system-account-xoa-password='MyPassW0rd!'
Finally, you must reboot the VM to implement the changes.
You can now connect with the xoa username and password you defined in the previous command, eg with ssh xoa@<XOA IP ADDRESS>.
# Using sudo
To avoid typing sudo for any admin command, you can have a root shell with sudo -s:
$ sudo -s

We trust you have received the usual lecture from the local System
Administrator. It usually boils down to these three things:

    #1) Respect the privacy of others.
    #2) Think before you type.
    #3) With great power comes great responsibility.

[sudo] password for xoa:
$
# Network configuration
XOA uses DHCP by default, so if you need to configure the IP address, please run the command xoa network static. It will ask you network details:
$ xoa network static
? Static IP for this machine 192.168.100.120/24
? Gateway 192.168.100.254
? IP of the DNS server 192.168.100.254
Xen Orchestra is now accessible in your browser at https://your-vm-ip.
You can access the VM console through XenCenter or using VNC through a SSH tunnel.
If you want to go back in DHCP, just run xoa network dhcp
# Other interfaces
If you need to configure other interfaces than the default one, you can use the same commands with the name of the interface to configure as supplementary argument:
$ xoa network static enX1
? Static IP for this machine 192.168.100.120
? Network mask (eg 255.255.255.0) 255.255.255.0

$ xoa network dhcp enX1
# Secondary IP addresses
To add more IP addresses on an already configured interface, you can use the --add flag:
$ xoa network static --add
? Static IP for this machine 192.168.200.120/24
# Firewall
By default XOA is firewalled, with only ports 22, 80 and 443 opened. You can see the current status of the firewall using the sudo ufw status verbose command:
Status: active
Logging: on (low)
Default: deny (incoming), allow (outgoing)
New profiles: skip

To                         Action      From
--                         ------      ----
22                         ALLOW IN    Anywhere
80                         ALLOW IN    Anywhere
443                        ALLOW IN    Anywhere
22/tcp                     LIMIT IN    Anywhere
22                         ALLOW IN    Anywhere (v6)
80                         ALLOW IN    Anywhere (v6)
443                        ALLOW IN    Anywhere (v6)
22/tcp                     LIMIT IN    Anywhere (v6)
If you want to open or close ports, please check the documentation of UFW (opens new window).
# Default XO account
Default user is admin@admin.net with admin as a password.
WARNING
If you are using the default credentials, please create a new admin account and remove this one.
In any case, if you lose your password, you can reset the database and get the default credentials back.
# Timezone
You can verify that your time is correctly set with the date command. To set XOA to your current timezone, use sudo dpkg-reconfigure tzdata.
# Setting a custom NTP server
By default, XOA is configured to use the standard Debian NTP servers:
pool 0.debian.pool.ntp.org iburst
pool 1.debian.pool.ntp.org iburst
pool 2.debian.pool.ntp.org iburst
pool 3.debian.pool.ntp.org iburst
If you'd like to use your own NTP server or another pool, you can make the changes directly in /etc/ntp.conf.
You will need to be root to edit this file (or use sudo). We recommend adding your custom server to the top of the list, leaving the debian server entries if possible.
For changes to take effect, you will need to restart NTP: sudo systemctl restart ntp.service.
# Restart the service
You can restart Xen Orchestra by accessing XOA via SSH (or console) and running systemctl restart xo-server.service.
To check the status of xo-server, use systemctl status xo-server.service, it should display something like this:
xo-server.service - XO Server
   Loaded: loaded (/etc/systemd/system/xo-server.service; enabled)
   Active: active (running) since Thu 2014-08-14 10:59:46 BST; 21min ago
 Main PID: 394 (node)
   CGroup: /system.slice/xo-server.service
           └─394 node /usr/local/bin/xo-server

Aug 14 10:59:46 xoa systemd[1]: Starting XO Server...
Aug 14 10:59:46 xoa systemd[1]: Started XO Server.
Aug 14 10:59:48 xoa xo-server[394]: WebServer listening on http://0.0.0.0:80
# Migrate from an older XOA
If you still use the first XOA (which was not the "unified" version), you can easily migrate all your settings (ACLs, users, servers, etc) to the new version painlessly.
To do so, go into "Settings/Config" of your old XOA. Export the configuration: you'll download a config.json file.

Now go to your new unified XOA, "Settings/Config" and import the config.json file you downloaded previously, by doing a drag and drop:

That's it!