# Incremental Replication (formerly : Continuous Replication)
This feature is an incremental replication system for your XCP-ng or Xenserver VMs without any storage vendor lock-in. You can replicate a VM every X minutes/hours to any storage repository. It could be to a distant XCP-ng or XenServer host or just another local storage target.
This feature covers multiple objectives:
- no storage vendor lock-in
- no configuration (agent-less)
- low Recovery Point Objective, from 10 minutes to 24 hours (or more)
- flexibility
- no intermediate storage needed
- atomic replication
- efficient DR (disaster recovery) process
If you lose your main pool, you can start the copy on the other side, with very recent data.

WARNING
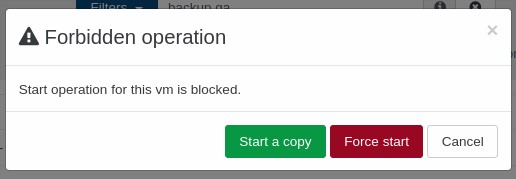
It is normal that you can't boot the copied VM directly: we protect it. The normal workflow is to make a clone and then work on it.
This also affects VMs with "Auto Power On" enabled, because of our protections you can ensure these won't start on your CR destination if you happen to reboot it.
# Configure it
As you'll see, it is trivial to configure. Inside the "Backup/new" section, select "Incremental replication".
Then:
- Select the VMs you want to protect
- Schedule the replication interval
- Select the destination storage (could be any storage connected to any host!)
That's it! Your VMs are protected and replicated as requested.
To protect the replication, we removed the possibility to boot your copied VM directly, because if you do that, it will break the next delta. The solution is to clone it if you need it (a clone is really quick). You can then do whatever you want with this clone!
# Manual initial seed
If you can't transfer the first backup through your network because it's too large, you can make a seed locally. In order to do this, follow this procedure (until we make it accessible directly in XO).
TIP
This is only if you need to make the initial copy without making the whole transfer through your network. Otherwise, you don't need this.
# Job creation
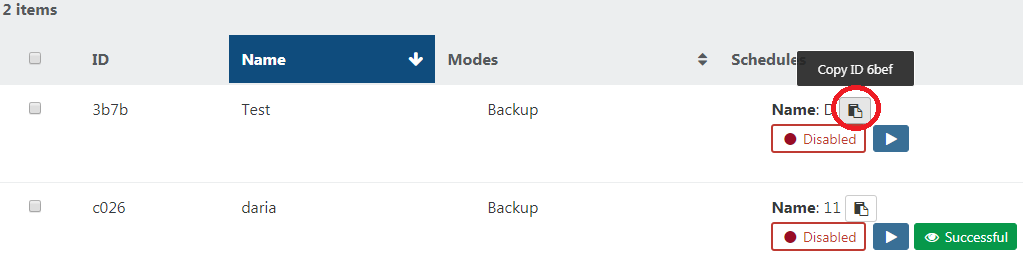
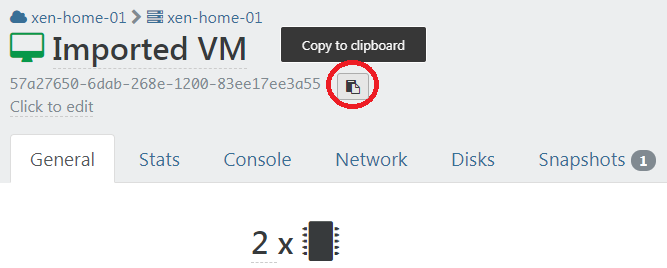
Create the Incremental Replication backup job, and leave it disabled for now. On the main Backup page, copy the job's backupJobId by hovering to the left of the shortened ID and clicking the copy to clipboard button:
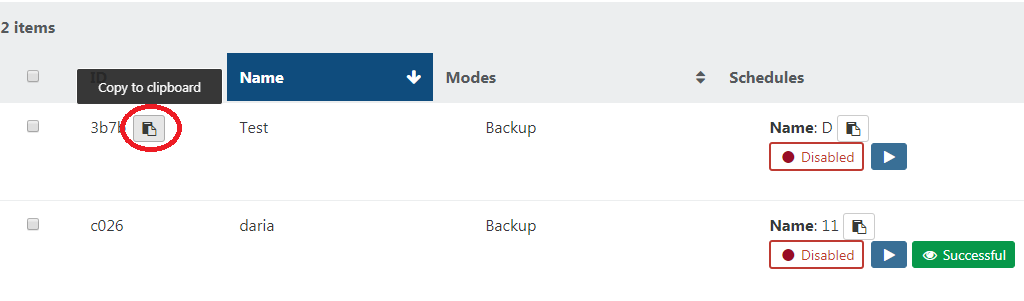
Copy it somewhere temporarily. Now we need to also copy the ID of the job schedule, backupScheduleId. Do this by hovering over the schedule name in the same panel as before, and clicking the copy to clipboard button. Keep it with the backupJobId you copied previously as we will need them all later:
# Seed creation
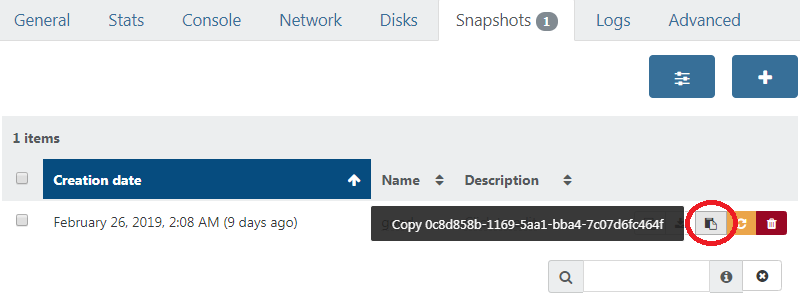
Manually create a snapshot on the VM being backed up, then copy this snapshot UUID, snapshotUuid from the snapshot panel of the VM:
WARNING
DO NOT ever delete or alter this snapshot, feel free to rename it to make that clear.
# Seed copy
Export this snapshot to a file, then import it on the target SR.
We need to copy the UUID of this newly created VM as well, targetVmUuid:
WARNING
DO not start this VM or it will break the Incremental Replication job! You can rename this VM to more easily remember this.
# Set up metadata
The XOA backup system requires metadata to correctly associate the source snapshot and the target VM to the backup job. We're going to use the xo-cr-seed utility to help us set them up.
First install the tool (all the following is done from the XOA VM CLI):
sudo npm i -g --unsafe-perm @xen-orchestra/cr-seed-cli
Here is an example of how the utility expects the UUIDs and info passed to it:
$ xo-cr-seed
Usage: xo-cr-seed <source XAPI URL> <source snapshot UUID> <target XAPI URL> <target VM UUID> <backup job id> <backup schedule id>

xo-cr-seed v0.2.0
Putting it altogether and putting our values and UUID's into the command, it will look like this (it is a long command):
$ xo-cr-seed https://root:password@xen1.company.tld 4a21c1cd-e8bd-4466-910a-f7524ecc07b1 https://root:password@xen2.company.tld 5aaf86ca-ae06-4a4e-b6e1-d04f0609e64d 90d11a94-a88f-4a84-b7c1-ed207d3de2f9 369a26f0-da77-41ab-a998-fa6b02c69b9a
WARNING
If the username or the password for your XCP-ng/XenServer hosts contains special characters, they must use percent encoding (opens new window).
An easy way to do this with Node in command line:
$ node -p 'encodeURIComponent(process.argv[1])' -- 'password with special chars :#@'
password%20with%20special%20chars%20%3A%23%40
# Finished
Your backup job should now be working correctly! Manually run the job the first time to check if everything is OK. Then, enable the job. Now only the deltas are sent, your initial seed saved you a LOT of time if you have a slow network.
# Failover process
In the situation where you need to failover to your destination host, you simply need to start all your VMs on the destination host.
TIP
If you want to start a VM on your destination host without breaking the CR jobs on the other side, you will need to make a copy of the VM and start the copy. Otherwise, you will be asked if you would like to force start the VMs.