
XO Proxy: a concrete guide
A introduction on how to create a global XCP-ng infrastructure managed by a central Xen Orchestra. In a secure manner without any 3rd party network tool.


If your infrastructure spans between multiple sites, and you're not dealing with any tunnels or extended L2 networking, proxies are great to connect everything together, regardless of your location and networks, as long as you have a basic Internet access.
Let's explore a very concrete case on how we use these proxies to manage, monitor and replicate our production infrastructure to any other site, hundreds of kilometers away from a production Datacenter.
All of that, without any overlay networking tools like Zerotier, Tailscale and such.
🥽 Best practices
You don't want to expose any XCP-ng host to the Internet. At best, you only want to have Xen Orchestra visible - ideally with TOTP enabled- or your proxy, behind a firewall, NAT and/or a security gateway. Nothing else.
Security wise, it's the reasonable way to go, but the other perk is to avoid consuming any public IPv4 for your XCP-ng hosts, nor even for your XOA or XO proxies!
Because you don't need any specific link or network configuration or overlay between your sites, it means you can rely on proxies with a very minimal investment. We'll see how to achieve that.
First, let's check what we already have, and then we'll deploy the proxy.
🌎 Multi-sites setup
Assuming you already have something like this on your main site:
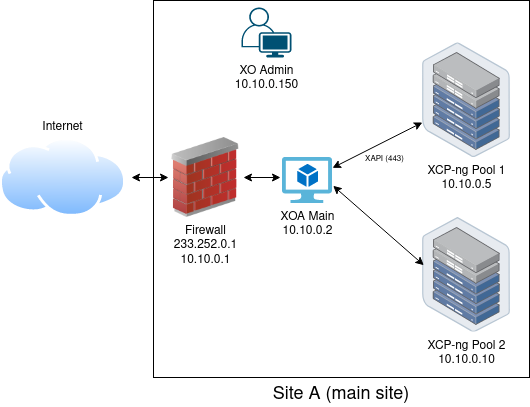
Now, let's imagine you'd like to manage your other site, with "only" Internet in the middle, while:
- Still using your central XOA to manage everything (regardless of firewall NAT, having access to VM consoles, stats and so on).
- Having the ability to use continuous replication in case you lose your main site.
- And anything else you can already do inside your main site without exposing your hosts outside while keeping everything behind a firewall.
This is possible by deploying an XO proxy on the other site, like this:

The only common network is the Internet. And without -at any time- having to expose your "remote" hosts to your main XOA.
1️⃣ Deploy the proxy remotely
This is the usual chicken and egg problem 🐣: how do you deploy the proxy easily if you don't have external API access to the existing hosts? Indeed, in XOA, there's the "usual"/simple way to deploy a proxy:
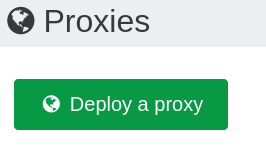
However, this simple way to deploy the proxy requires an existing connection to the destination XCP-ng host to deploy it. So what's the alternative to deploy the proxy when you can't reach it directly?
👨💻 Deploy from a terminal
Enter our "proxy deploy script". Similar to our one-liner to deploy an XOA from a shell on your XCP-ng, you will use this to deploy your new proxy. Just SSH to your host and run :
bash -c "$(wget -qO- https://xoa.io/proxy/deploy)"From there, just follow the prompt (this will deploy the proxy on the configured default SR):
[myXCPng-host]# bash -c "$(wget -qO- http://xoa.io/proxy/deploy)"
Welcome to the XO Proxy auto-deploy script!

Network settings:
IP address? [dhcp]

Your XO Proxy will be started using DHCP

Your Xen Orchestra account (email)? myname@example.org
Your Xen Orchestra account password? (hidden)

Importing XO Proxy VM...
Booting XO Proxy VM...
Waiting for your XO Proxy to be ready…

Your XO Proxy IP address is:
  192.168.2.20

XO Proxy UUID: 8803d4c7-ca48-4a37-9ac5-84ccd3ae3c65

XO Proxy Token: H9WwSAeoTEENI8ddxeosejpz7L8DZLvLJafuncyh
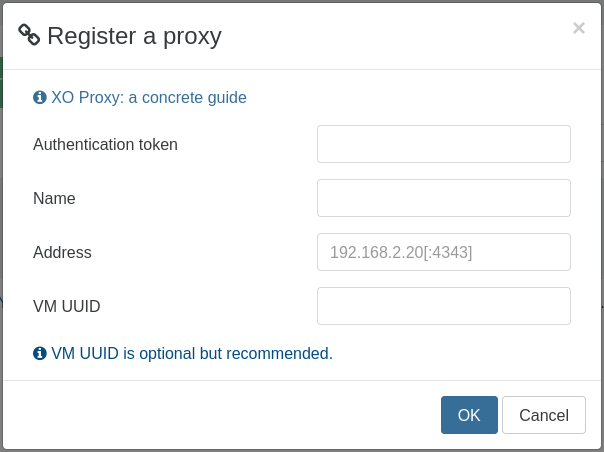
And that's it: the proxy is deployed and running on your host. Note that you have multiple pieces of information available when it's done: the local IP address, the XO Proxy UUID and its token. You need to keep the token and the UUID for the next steps, they are needed to add the proxy in XO.
🧱 Behind your firewall
You can NAT/firewall your proxy to expose it indirectly to the Internet, which is very simple to do. In our example, we decided that the proxy will be available only at 203.0.113.23:4443 (via our public IP on the firewall) and NATed internally to 192.168.2.20:443.
It doesn't matter for our proxy system, it will handle/redirect everything correctly to the main XOA.
2️⃣ Add the proxy in XOA
Now, we want to "attach" this existing proxy to our main XOA. To do that, you can do it from the UI or the CLI of XOA.
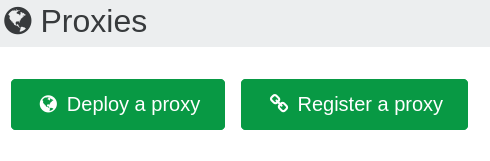
From the UI
Go in the left menu, "Proxies", then "Register a proxy":
And fill with the previous information:
From the CLI (alternative)
First, install the CLI and register it:
[xoa@xoa]# sudo npm i -g xo-cli
[xoa@xoa]# xo-cli --register http://localhost xoa
Password: ********
Successfully logged with xoa
[xoa@xoa]#
Next step, add the proxy:
[xoa@xoa]# xo-cli proxy.register authenticationToken=H9WwSAeoTEENI8ddxeosejpz7L8DZLvLJafuncyh address=203.0.113.23:4443 vmUuid=8803d4c7-ca48-4a37-9ac5-84ccd3ae3c65
36aa8061-525d-4580-8574-9007f7cae3d8
That's it! Now the proxy is visible right in your XOA:

3️⃣ Use the proxy
Now you can enjoy all the benefits of the proxy, like doing backups on the remote site on a "local" backup repository (backup traffic will stay on the remote site) but also use it as a real XAPI proxy to manage the whole site from your main XOA, without direct access to the host.
🔗 Add a pool via the proxy
Go into your Settings > Server page, and add the host from your main XOA. Here is the catch: use the URL of your proxy.
To know that URL, go into the XO Proxy view, open the menu and click on the "Copy proxy URL":
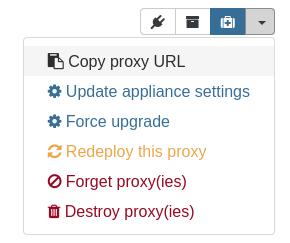
You will paste this URL when you'll add the server in Settings/server:

- Label: whatever human readable label you'd like. Could be "Replication site" for example.
- Address: the local address inside the remote site. For example, if your XCP-ng primary host is using
192.168.2.10on that site, that's what you need to add there. Remember it's from the proxy point of view! - Username/password: your XCP-ng credentials.
- HTTP proxy URL: paste the URL from the "Copy proxy URL". In our example, it should be something like:
https://<TOKEN>@203.0.113.23:4443/
And that's it! Now you should see your configured pool from your main XOA.
♊ Continuous Replication to the remote site
In order to do more than just manage your pools and hosts all over the world in a secure manner, we also added the capability for the main XOA to be smarter and detect when you use a continuous replication job, flowing the data automatically through the right proxy.
So now, configuring a continuous replication job between sites with the proxy in the middle is entirely transparent. As any other CR job, just select the destination storage repository (on any host at the remote site), because it's now visible on your main XOA.
And finally, on the next run, the traffic will flow from "source" XCP-ng to XOA, then to the proxy and finally the destination XCP-ng host on the remote site. You can also do the opposite: replicate VMs from site B to your main site. Or any other site all around the world!
💾 Configure a backup job via the proxy
At the "Backup repository" creation screen, you can specify to which proxy it will make the connection and transfer data (in the "Proxy selector"):
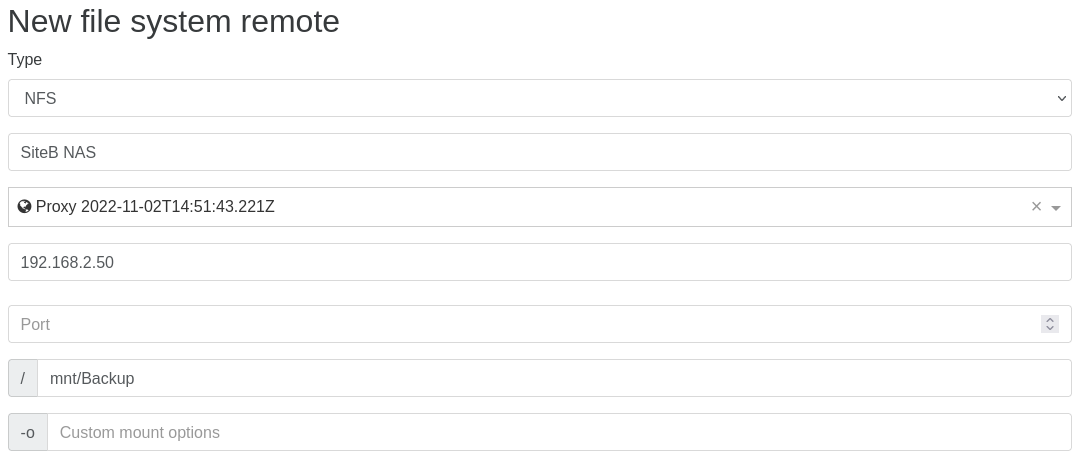
Like for the XCP-ng API proxy, you need to fill the information from the proxy point of view (so the local/private IP of your NAS on that remote site), since the proxy will connect to it, and not your main XOA.
Conclusion
Thanks to XO proxies, it's entirely possible to use XCP-ng hosts at any number of sites while keeping a single "central" XOA to manage them all. This is also a powerful way to scale horizontally for all your backups on each site.
And the most important thing: the whole setup is entirely secure. All the traffic is encrypted and no hosts are exposed/visible on Internet. Without relying on any 3rd party "overlay network" tools.