
Xen Orchestra from the CLI

⚠: Some part of this article may be outdated. Please, rely on our documentation for correct usage of the CLI commands.
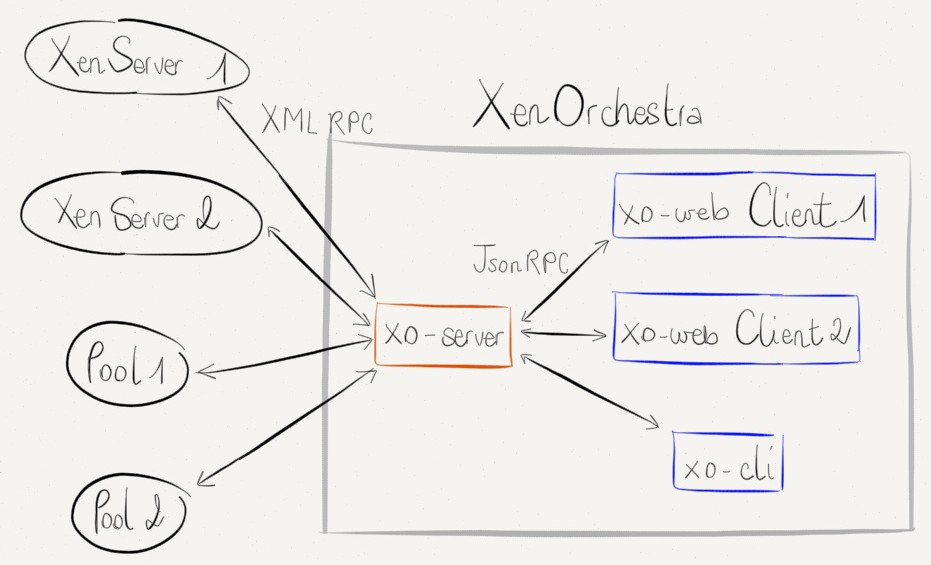
As explained in a previous post, Xen Orchestra is not just a web interface to Xen, it is also a modular infrastructure which can be interfaced with very easily through its API (still unstable though :p). We recently created a new XO client which allows you to manage your whole infrastructure from the command line: xo-cli. Here is the global architecture:
xo-cli is just a new client, just like XO-Web, which can be used in parallel with it. What use is it if there is already xe CLI? Well, first you can manage all servers from one place because of the central place of XO-Server. You can also use it to automatically register servers into your Xen Orchestra installation (that was the initial demand after all).
Installation
We tried to make it as easy as possible to let you focus of the use instead of the boring part: npm install -g xo-cli and you're ready to go! You can find more about the NPM package on its page.
Usage
First, you need to associate the CLI to an existing Xen Orchestra installation:
xo-cli --register http://xo.my-company.net/api/admin@admin.net admin
You can now discover all the available commands:
xo-cli --list-commands
Good news: thanks to introspection, xo-cli can see automatically ALL the features included in XO-server. An example:
xo-cli server.add my.server.net root secret-password